Brother Sewing Machine Instruction Manual: A Comprehensive Guide
This manual details Brother sewing machines, covering models from basic electric (SM Series) to advanced embroidery machines, offering comprehensive guidance for all skill levels.
Brother sewing machines represent a legacy of innovation and reliability, catering to both beginner and experienced sewists. From fundamental electric models like the SM3701, ideal for learning basic techniques, to sophisticated machines boasting 135 embroidery stitches, 103 sewing stitches, and 10 fonts, Brother offers a diverse range.
These machines often feature user-friendly designs, including automatic needle threaders and foot pedal control options – crucial for accessibility. The Brother ecosystem extends beyond the machine itself, with resources like the Zorbas Sewing Machine database and the Artspira app enhancing the creative process.
Understanding Your Machine Model
Identifying your specific Brother model is the first step to unlocking its full potential. Models range from the basic SM Series, designed for simplicity, to more advanced machines like those offering compatibility with the Artspira app. Older versions, such as the Amazon Marvel 450, may have limited app functionality.
Key specifications to note include the embroidery space dimensions (44mm is common), the number of built-in stitches, and available features like automatic needle threading. Understanding these details allows you to utilize the machine’s capabilities effectively and access relevant support resources.
Key Features and Capabilities
Brother sewing machines boast a diverse range of features. Many models offer an impressive 135 built-in embroidery stitches, alongside 103 sewing stitches and 10 distinct fonts for personalized projects. The automatic needle threader simplifies setup, while foot pedal control provides traditional operation, though some models allow operation without it.
Advanced capabilities include free-motion quilting and utilizing preloaded alphabets for decorative stitching. Modern machines transcend basic straight lines, offering versatility for both beginners and experienced sewers. Review scores often reflect this, with many models achieving a 4.5 rating.
Built-in Stitches: Sewing & Embroidery
Brother machines excel in stitch variety. Many models, like those discussed, feature a substantial library of 103 sewing stitches, catering to diverse project needs – from basic seams to decorative embellishments. Beyond standard sewing, a generous 135 built-in embroidery stitches unlock creative possibilities, allowing for intricate designs and personalization.
Furthermore, the inclusion of 10 pre-programmed fonts enables users to easily embroider lettering and monograms. This extensive stitch selection empowers both novice and experienced users to tackle a wide array of sewing and embroidery endeavors with precision and flair.
Embroidery Space Dimensions
Understanding the embroidery area is crucial for design planning. Brother machines boast a generous 44mm x 40mm embroidery space, providing ample room for creating detailed and visually appealing designs. This dimension allows for a wide range of embroidery projects, from monograms and lettering to intricate patterns and motifs.
Careful consideration of these dimensions is essential when selecting or creating embroidery designs, ensuring they fit within the machine’s capabilities. Larger designs may require re-sizing or dividing into multiple sections for successful embroidery.
Automatic Needle Threader Functionality
Brother’s automatic needle threader simplifies a traditionally tedious task. This feature significantly reduces threading time and eye strain, especially beneficial for users with limited dexterity or vision. To utilize, simply follow the numbered threading path indicated on the machine, lower the presser foot, and engage the automatic threader lever.

The machine then guides the thread through the needle eye, completing the process with minimal effort. Ensure correct thread tension and proper thread placement for optimal performance. Regular cleaning of the threading area maintains smooth operation.
Foot Pedal Control Options
Brother sewing machines offer versatile foot pedal control, catering to diverse user preferences and needs. Many models, like those discussed, allow operation with or without the foot pedal, providing accessibility for individuals unable to utilize a traditional pedal. This feature enhances convenience and adaptability.
The foot pedal regulates sewing speed; gentle pressure yields slower stitching, while increased pressure accelerates the process; Some machines offer electronic speed control via the pedal, providing precise adjustments. Proper foot pedal connection and functionality are crucial for seamless operation.
Setting Up Your Brother Sewing Machine
Proper setup is crucial for optimal performance. Initial machine setup involves connecting the power cord, attaching the foot pedal, and ensuring all components are securely in place. Before sewing, you must wind the bobbin – a fundamental step for creating stitches. Refer to your model’s specific diagrams for correct bobbin winding technique.
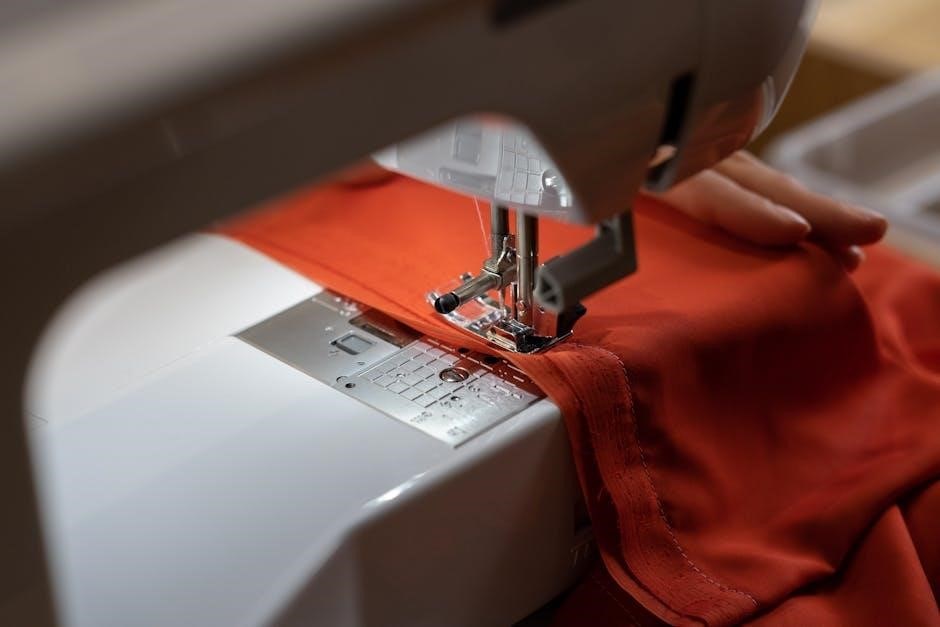
Next, thread the upper thread following the numbered threading path illustrated in the manual. Utilizing the automatic needle threader, if equipped, simplifies this process. Correct threading prevents issues like skipped stitches and ensures smooth operation.
Initial Machine Setup
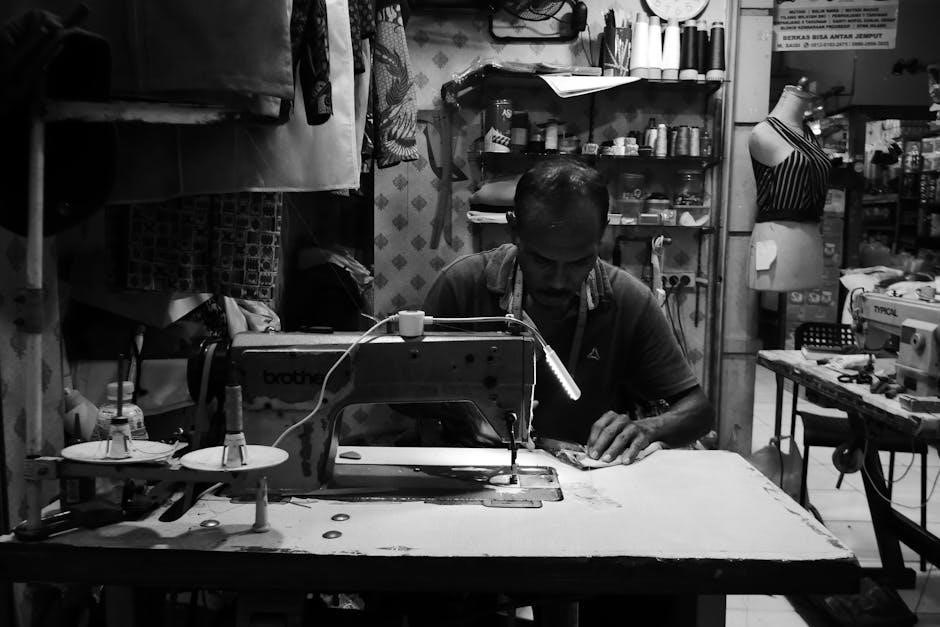
Begin by carefully unpacking your Brother sewing machine and verifying all included accessories are present. Connect the power cord to a grounded outlet and attach the foot pedal. Ensure the machine is placed on a stable, level surface. Familiarize yourself with the machine’s key components, including the bobbin winder, thread tension dial, and stitch selection panel.
Before first use, gently clean the machine with a soft cloth to remove any dust or debris. Confirm the presser foot is securely attached. Understanding these initial steps will lay the foundation for successful sewing.
Winding the Bobbin
To wind the bobbin, place the thread spool on the spool pin. Guide the thread through the thread guides, ensuring it’s properly seated. Next, thread the end of the thread through the tension disc and onto the bobbin. Place the bobbin onto the bobbin winder spindle, pressing it firmly into place.
Engage the bobbin winder by pushing the bobbin winder lever to the right. Press the foot pedal gently to start winding. Once full, the bobbin winder will automatically stop. Carefully remove the bobbin and trim the thread end.
Threading the Upper Thread
Begin by raising the presser foot and the needle to its highest position. Place the spool of thread on the spool pin. Guide the thread through the first thread guide, then down and around the tension discs – ensuring it snaps securely into place. Continue threading through the take-up lever, and then down to the needle bar.
Finally, thread the needle from front to back. For machines with an automatic needle threader, utilize that feature for ease. Always double-check that the thread is correctly seated in all guides before beginning to sew.
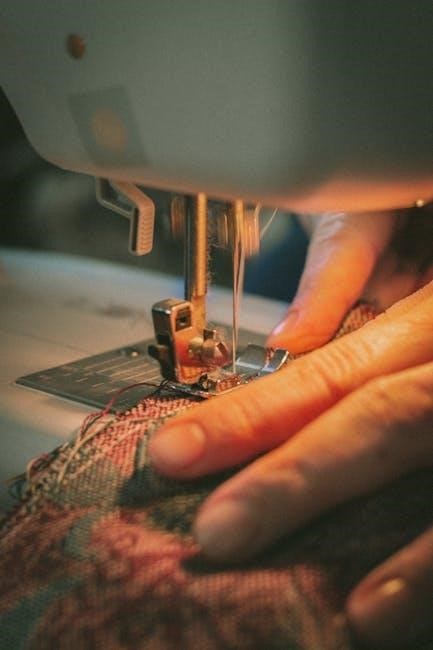
Basic Sewing Operations
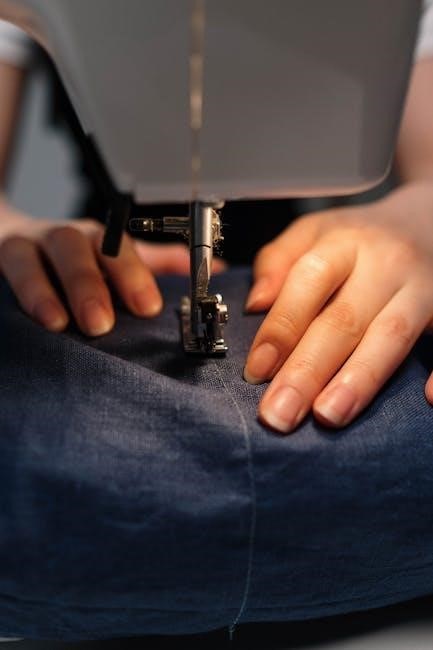
Mastering basic operations is key to successful sewing. Begin by selecting your desired stitch pattern using the stitch selection dial. Next, adjust the stitch length and width according to your fabric and project requirements. Always test your settings on a scrap piece of fabric first!
Fabric selection is crucial; choose the appropriate fabric type and pair it with the correct needle. Straight stitches are ideal for general sewing, while zigzag stitches offer flexibility. Practice consistent sewing speed for neat, even seams.
Selecting Stitch Patterns
Brother sewing machines boast a wide array of stitch patterns, with some models offering over 100 sewing stitches and 135 embroidery designs. Utilize the stitch selection dial or digital interface to browse available options. Straight stitches are fundamental for seams, while zigzag stitches provide stretch and finishing capabilities.
Explore decorative stitches for embellishment. Many machines include preloaded alphabets for monogramming and personalized projects. Refer to your machine’s stitch chart for pattern details and recommended uses. Experiment with different stitches on scrap fabric to understand their effects.
Adjusting Stitch Length and Width
Precise stitch control is crucial for quality sewing. Brother machines feature dials or buttons to adjust stitch length and width. Shorter stitch lengths are ideal for delicate fabrics and curves, increasing durability. Longer lengths are suitable for basting or gathering.
Stitch width determines the breadth of zigzag or decorative stitches. Wider widths create bolder patterns, while narrower widths offer subtle effects. Always test adjustments on scrap fabric before sewing your project. Incorrect settings can cause puckering or thread breakage, so careful calibration is key.
Fabric Selection and Needle Types
Choosing the right fabric and needle is paramount for successful sewing. Lightweight fabrics like chiffon require fine needles (size 60/8 or 70/10) to prevent snagging. Medium-weight cottons work well with universal needles (size 80/12 or 90/14). For denim or canvas, use heavy-duty needles (size 90/14 or 100/16).
Always match the needle type to the fabric. Ballpoint needles are best for knits, preventing skipped stitches. Sharps are ideal for woven fabrics. Regularly changing needles ensures clean, consistent stitches and avoids damage to both fabric and machine.
Advanced Sewing Techniques
Elevate your sewing skills with techniques like free-motion quilting, allowing for intricate designs and personalized touches. Utilize the preloaded alphabets to monogram garments or create custom labels, adding a unique flair to your projects. Brother machines offer hundreds of stitches beyond basic straight lines, enabling complex decorative work.
Experiment with different stitch combinations and settings to achieve desired effects. Mastering these techniques unlocks creative potential, transforming simple sewing into artistic expression. Practice and patience are key to refining these advanced skills.
Free-Motion Quilting
Unleash your creativity with free-motion quilting, a technique allowing you to draw designs on fabric using the sewing machine. Lower the feed dogs to disengage automatic fabric movement, giving you complete control. Use a darning foot for optimal visibility and maneuverability.
Practice consistent speed and gentle guidance; the machine’s motion dictates the stitch pattern. Start with simple designs and gradually progress to more complex motifs. This technique requires patience and a steady hand, but the results are stunning, adding texture and artistry to quilts and projects.
Using Preloaded Alphabets
Personalize your projects with the Brother machine’s preloaded alphabets! Access these fonts through the stitch selection menu, choosing your desired letter style and size. Many models boast 10 different fonts, offering versatility for monograms, names, or custom messages.
Carefully follow the machine’s display prompts for letter sequencing and spacing. Utilize the built-in editing functions to arrange letters and preview the final result. Experiment with different font combinations and colors to create unique and eye-catching embellishments on garments, quilts, and home décor items.
Troubleshooting Common Issues
Encountering problems? This section addresses frequent issues. Thread breakage often stems from incorrect threading, a dull needle, or incompatible thread. Needle breakage can occur with thick fabrics or forcing the fabric. Always use the correct needle type! Machine jamming and error codes usually indicate improper bobbin winding or thread tension.
Consult your machine’s display for specific error code meanings. Ensure the machine is clean and properly lubricated. If issues persist, refer to the full manual or seek assistance from online resources like the Zorbas Sewing Machine Database for model-specific guidance.
Thread Breakage Problems
Frequent thread breaks are frustrating, but often easily resolved. Incorrect threading is a primary cause – re-thread both the upper thread and bobbin, ensuring proper path and tension. A dull or damaged needle can also contribute; replace it with a new, appropriate needle for your fabric. Incompatible thread, too thick or thin, can cause breaks.
Check your bobbin winding; uneven winding leads to weak spots. Finally, ensure correct thread tension – too tight or too loose can cause breakage. Experiment with slight adjustments to find the optimal setting.
Needle Breakage Solutions
Needle breakage can halt your project, but understanding the causes helps prevent recurrence. Using the wrong needle type for your fabric is a common issue – delicate fabrics require finer needles, while heavier materials need stronger ones. Forcing the fabric through the machine puts excessive strain on the needle.
Incorrect needle insertion, or a bent needle, will also cause problems. Always ensure the needle is fully inserted and facing the correct direction. Hitting a pin while sewing is a frequent culprit; remove pins before the needle reaches them. Finally, check for machine malfunctions if breakages persist.
Machine Jamming and Error Codes
Machine jamming often stems from tangled bobbin thread or fabric caught within the mechanism. Always re-thread both upper and bobbin threads correctly after changing them. Lint and debris accumulation can also cause jams; regular cleaning is crucial. Error codes displayed on the machine’s screen indicate specific problems.
Consult your Brother sewing machine’s manual to decipher these codes – they might signal issues with threading, the bobbin, or internal components. Avoid forcing the machine if it’s jammed; gently remove the fabric and re-thread. If errors persist, professional servicing may be required.
Maintenance and Care
Regular maintenance extends your Brother sewing machine’s lifespan and ensures optimal performance. Cleaning is paramount; brush away lint from the bobbin area and feed dogs after each use. A small vacuum can also be helpful. Lubrication is essential, but use only sewing machine oil – avoid general-purpose oils.
Refer to your machine’s manual for specific lubrication points. Dust covers protect against dust accumulation when not in use. Proper storage prevents damage. Ignoring maintenance can lead to malfunctions and costly repairs, so prioritize these simple steps.
Cleaning Your Sewing Machine
Consistent cleaning is vital for a smoothly operating Brother sewing machine. Begin by powering off and disconnecting the machine. Use a soft brush to remove lint and dust from the bobbin area, feed dogs, and needle plate after each sewing session. A vacuum cleaner with a brush attachment can effectively remove debris from hard-to-reach areas.
Periodically, wipe down the exterior with a damp cloth; Avoid harsh chemicals or abrasive cleaners. Pay attention to the needle area, ensuring no thread fragments accumulate. Regular cleaning prevents jams and maintains stitch quality.
Lubrication Guidelines
Proper lubrication ensures the longevity and smooth operation of your Brother sewing machine. Avoid over-lubrication, as excess oil attracts dust. Only use sewing machine oil – never household oils. Apply a small drop to the bobbin race, hook assembly, and other designated oiling points as indicated in your machine’s specific manual.
Caution: Some modern machines are sealed and do not require manual oiling. Refer to your model’s documentation. Regularly wipe away any excess oil to prevent staining fabric. Consistent, minimal lubrication is key to maintaining optimal performance.
Parts and Accessories
Brother sewing machines utilize a variety of parts and accessories to enhance functionality. Bobbin types are crucial; Class 15 bobbins are commonly compatible with many Singer and Brother models. Ensure correct bobbin selection for optimal stitch quality. Screwdriver keys, specifically designed for sewing machine repair, are essential for maintenance and adjustments.
Additional accessories include various presser feet, needles, and cleaning brushes. Genuine Brother parts are recommended for reliability. Online resources, like those detailing industrial machine parts (V7100/D, W8100/D), can aid in identifying specific components.
Bobbin Types and Compatibility (Class 15)
Class 15 bobbins are a widely used standard, compatible with numerous Brother sewing machine models, as well as many Singer machines. These plastic bobbins are readily available in packs of 50 or more, ensuring a consistent supply for projects. Proper bobbin selection is vital for achieving balanced stitches and preventing machine malfunctions.
Incorrect bobbin types can cause tension issues, skipped stitches, and even damage to the machine. Always verify compatibility with your specific model before use. Genuine Brother Class 15 bobbins are recommended for optimal performance and reliability, though quality aftermarket options exist.
Screwdriver Keys for Sewing Machine Repair
Specialized screwdriver keys are essential for disassembling and repairing Brother sewing machines. These aren’t standard screwdrivers; they feature unique head shapes designed to fit the screws used within the machine’s intricate mechanisms. A comprehensive set typically includes various sizes and types to accommodate different models and components.
Using the correct key prevents stripping screw heads, which can complicate repairs significantly. These keys are invaluable for tasks like replacing belts, adjusting tension, and cleaning internal parts. Investing in a quality set is crucial for anyone undertaking sewing machine maintenance or repair, ensuring efficient and damage-free work.
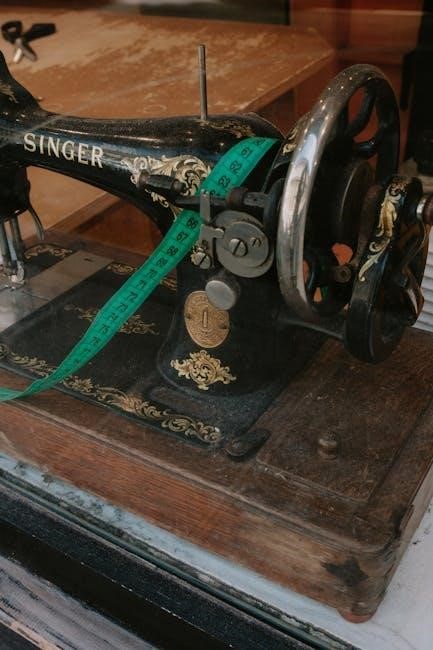
Brother SM Series Models (Basic Electric)
The Brother SM series represents a line of fundamental, electrically powered sewing machines ideal for beginners and simple sewing tasks. Models like the SM3701 are characterized by their straightforward operation and affordability. These machines typically offer a selection of essential stitches, focusing on practicality rather than extensive features.
While lacking advanced capabilities like automatic threading or extensive embroidery options, the SM series provides a reliable and durable sewing experience. They are a great entry point for learning basic sewing techniques and completing everyday repairs. Their simplicity makes them easy to maintain and troubleshoot, appealing to those seeking a no-frills sewing solution.
Industrial Sewing Machine Parts References (V7100/D, W8100/D)
Brother provides detailed parts lists for its industrial sewing machine models, including the V7100/D, DE, F, ML and W8100/D, DE, F, C series, as well as the W8042. These references are crucial for repair technicians and experienced users needing to replace components. The documentation features numbered parts listings accompanied by illustrative images, aiding in accurate identification.
These resources extend to models like the WX8800D, WX8800C, WX8803DW-33L, WX8842, and MMX3303D. Accessing these parts references ensures compatibility and facilitates efficient maintenance of these robust machines, minimizing downtime and maximizing operational lifespan. Proper part selection is vital for maintaining performance.
Online Resources and Support
Brother offers extensive online support for its sewing machine users. The Zorbas Sewing Machine Database, specifically the JA/JC number database, is a valuable resource for identifying parts and models. Furthermore, compatibility with the Brother Artspira app (model-specific) unlocks creative possibilities for embroidery designs and personalization.
Online communities, like dedicated sewing forums, provide a platform for users to ask questions, share projects, and learn from each other. These resources supplement the official instruction manuals, offering practical advice and troubleshooting assistance. Remember to check for video tutorials demonstrating techniques on similar machines.
Zorbas Sewing Machine Database (JA/JC Numbers)
The Zorbas Sewing Machine Database is an invaluable online resource for Brother sewing machine owners. It meticulously catalogs machines using JA/JC numbers, facilitating accurate identification of models and corresponding parts. This database is particularly useful when sourcing replacement components or seeking information about older, discontinued machines.
Navigating the database allows users to pinpoint their machine’s specific details, aiding in troubleshooting and repair efforts. Understanding the JA/JC numbering system streamlines the process of finding compatible accessories and manuals. It’s a community-driven effort, constantly updated with new information and contributions from sewing enthusiasts.
Brother Artspira App Compatibility (Model Specific)
The Brother Artspira app expands the creative possibilities of compatible sewing and embroidery machines. This cloud-based platform offers a vast library of designs, fonts, and patterns, accessible directly from your device. However, compatibility isn’t universal; older models, like some versions of the Marvel 450, may not function with the latest Artspira updates.
Before subscribing or purchasing designs, verify your machine’s compatibility on the official Brother website. Artspira allows for seamless design transfer and editing, enhancing personalization. Regular app updates ensure optimal performance and access to new features, but confirm continued support for your specific Brother model.